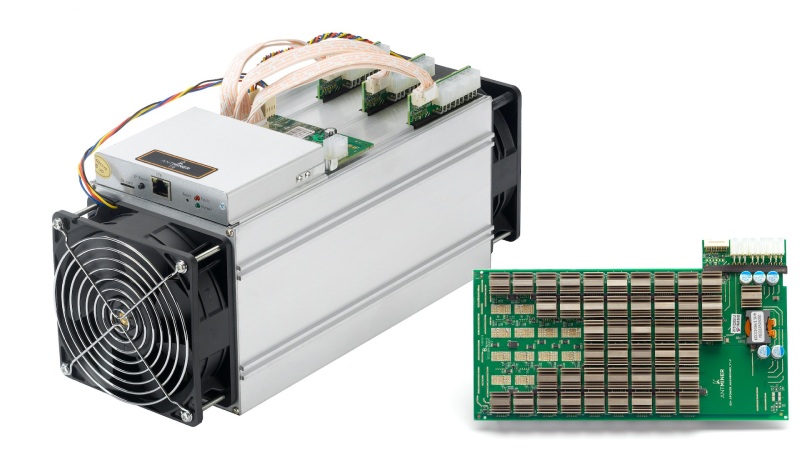
ASIC mining rigs are specialized computer systems designed specifically for mining cryptocurrencies, most notably Bitcoin. Despite their high performance, ASIC mining rigs are not immune to hardware failures and malfunctions.
In this blog, we’ll go through some tips and tricks for repairing your ASIC repair mining rig, so you can get back to mining with minimal downtime.
Step 1: Identify the problem
The first step in repairing your ASIC mining rig is to identify the problem. This can be done through a process of elimination, starting with the most common issues and working your way down. Some common issues include power failures, network connectivity problems, and hardware failures.
If your rig is not powering on, check the power supply and cables. If your rig is not connecting to the network, check the network cable and settings. If you suspect a hardware failure, move on to the next step.
Step 2: Gather Tools and Parts
Before you begin the repair process, make sure you have the necessary tools and parts on hand. You’ll need a screwdriver, pliers, and possibly a soldering iron, depending on the severity of the issue.
You may also need to purchase replacement parts, such as fans or power supplies, so be sure to have access to the manufacturer’s website or a reliable supplier.
Step 3: Remove the Cover
Once you have the tools and parts ready, it’s time to remove the cover of your ASIC mining rig. This will give you access to the internal components and allow you to diagnose the problem more accurately. To remove the cover, simply remove the screws securing it in place and lift it off.
Step 4: Check the Power Supply
The power supply is one of the most common culprits of hardware failures in ASIC mining rigs. To check the power supply, first, make sure it’s properly connected to the motherboard. If it is, check the voltage readings using a multimeter.
If the readings are not within the manufacturer’s specifications, the power supply may be faulty and need to be replaced.
Step 5: Check the Cooling System
The cooling system is another common cause of hardware failures in ASIC mining rigs. If your rig is overheating, it can cause damage to the components and lead to malfunctions. To check the cooling system, first, make sure the fans are properly connected and running.
If they are, check the thermal paste between the chips and heat sink, as it may need to be reapplied. If the problem persists, you may need to replace the fans or the entire cooling system.
Step 6: Check the Network Connectivity
If your ASIC mining rig is not connecting to the network, it may be a problem with the network cable or the network settings.
To check the network cable, make sure it’s properly connected and not damaged. If it’s not the cable, then check the network settings, as they may need to be reconfigured.
Step 7: Replace Parts
If you’ve determined that a specific component is faulty, it will need to be replaced. This may require soldering or other technical skills, so be sure to have the necessary tools and experience before attempting to replace parts.
If you’re not confident in your ability to replace parts, it may be best to seek the help of a professional.
Step 8: Reassemble and Test
Once you’ve replaced any faulty parts, it’s time to reassemble your ASIC mining rig. Be sure to reconnect all cables and components, and secure the cover back in place. Finally, power on your rig and test it to make sure everything is working properly.